Xilinx provides a complete software development environment. In the Xilinx SDK, every software project will contain an application project, and a BSP project. For application engineering, Xlinx recommends only including code related to the application. BSP projects, as well as hardware-related code, as well as some common libraries, such as TCP/IP, operating systems, etc. When you create a new project, an application project and a BSP project are created by default. Of course, customers can change the default settings to use existing BSP projects. After creating the project, you can also change the BSP project corresponding to the application project.
In the figure below, the project test1 originally had its own bsp project test1_bsp. After changing its BSP project to test2_bsp, delete the project test1_bsp and still compile successfully.
BSP projects, designed to manage common code, can be shared by multiple application projects. However, there are still some customers, especially those who have used the MCU. The original tool puts all the code in one project, so it still prefers to include all the code in a project. From a certain point of view, such code is simpler and has lower coupling with Xilinx tools, which is more suitable for version management.
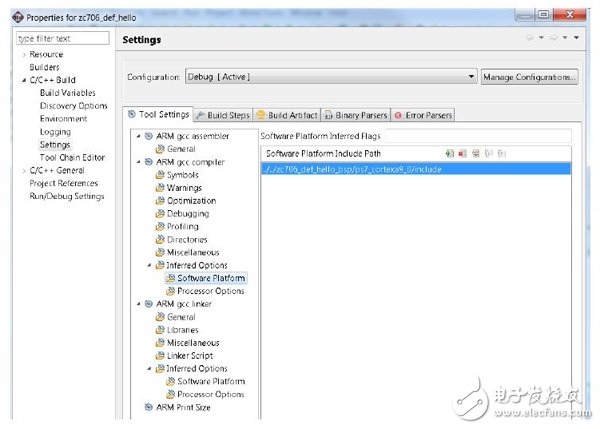
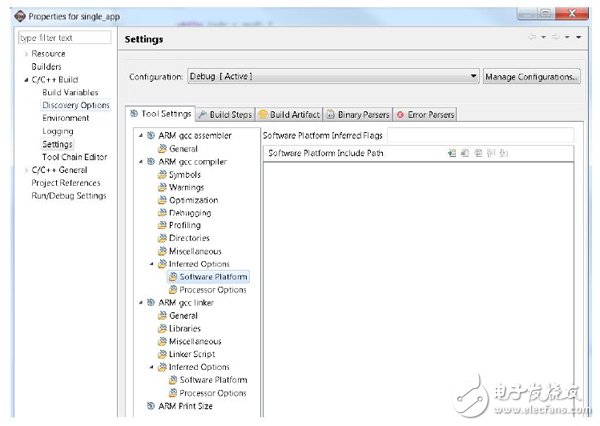
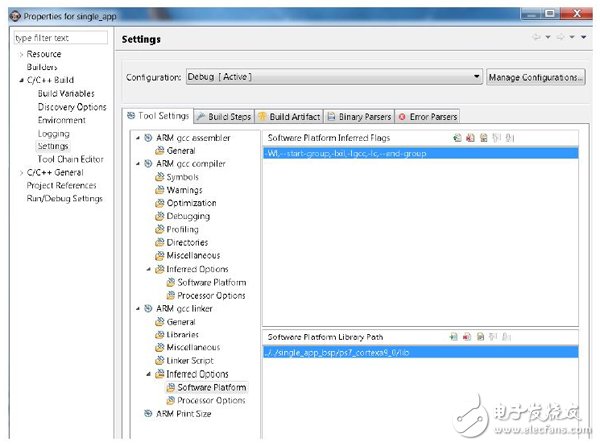
This requirement, although rarely requested by customers, can be done in the Xilinx SDK. After selecting a software project, select “ProperTIes†in the right-click menu, then select “C/C++ Build†in the settings window -> “SetTIng†-> “ARM GCC Compiler†-> “Inferred OpTIons†-> “Software Platform†-> "Software Platform Include Path", then delete the include path provided by the BSP project (it points to the header file directory). In the following picture, the project name is single_app, and the header file directory corresponding to the BSP project is "../../single_app_bsp/ps7_cortexa9_0/include". Can refer to the following pictures.
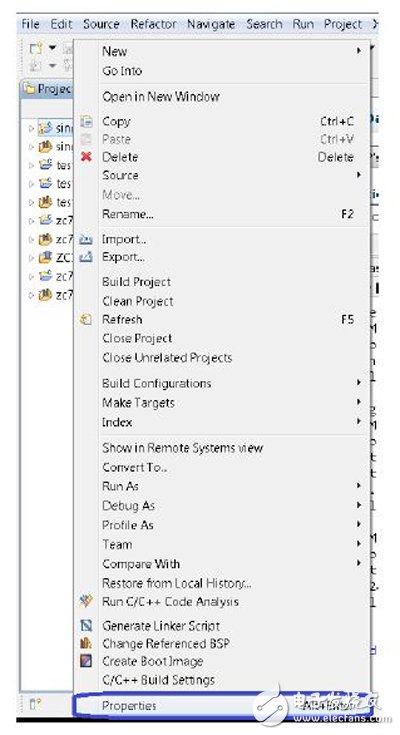
Image before deletion:
Deleted picture:
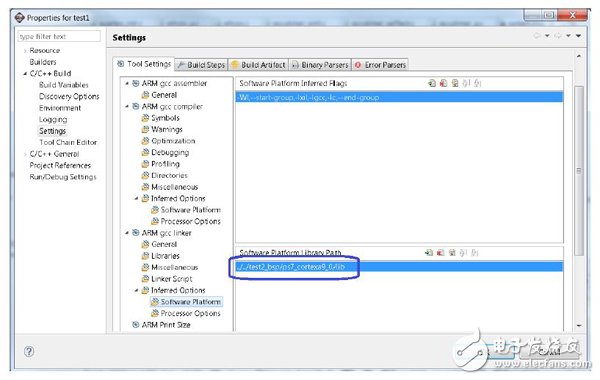
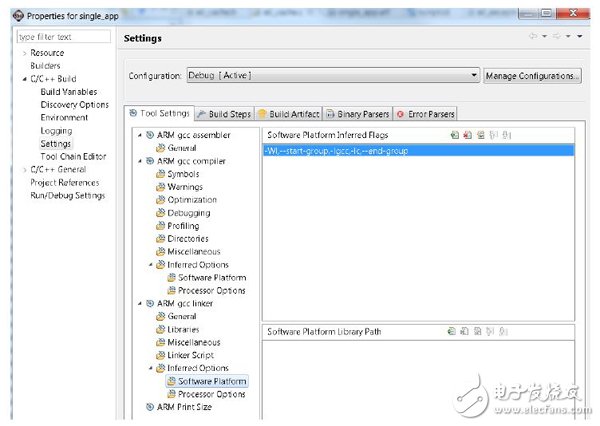
Also remove the reference to the library provided by the BSP project. This requires "-cxil" in the "C/C++ Build" -> "SetTIng" -> "ARM GCC Linker" -> "Inferred Options" -> "Software Platform" -> "Software Platform Inferred Flags" in the settings window. ". Also delete the directory in the "C/C++ Build" -> "Setting" -> "ARM GCC Linker" -> "Inferred Options" -> "Software Platform" -> "Software Platform Library Path" in the settings window. For the project "single_app", the directory is "../../single_app_bsp/ps7_cortexa9_0/lib".
Image before deletion:
Deleted picture:
After deleting the reference to the BSP project, all header files, drivers, etc. will be lost. Customers need to create these files. There is also a simple way to copy the header files in the original project, such as xparameters.h, xparameters_ps.h, as the definition header file for hardware information. Customers can use this as a basis and modify it above. For a basic embedded software, you need to initialize the CPU, cache, MMU, timer, serial port, etc. The files it needs are
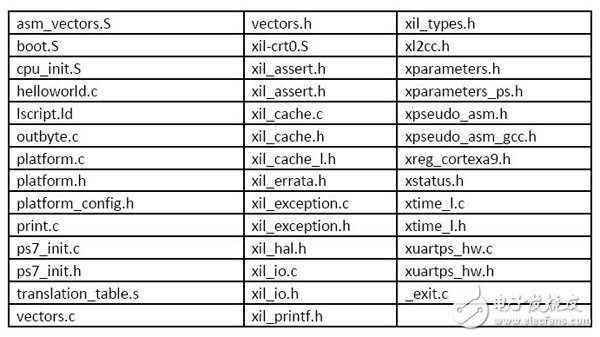
These files can be found directly in the "\ps7_cortexa9_0\libsrc\standalone_v3_12_a\src" directory of the BSP project and under the respective driver directories under "\ps7_cortexa9_0\libsrc\".
Such a minimal project, if you remove the optional ps7_inti.c and xil_assert.c, the size is 25732 bytes. A default hello project created by the Xilinx SDK with a size of 22,812 bytes. This means that the project generated by the Xilinx SDK by default is the smallest project, and the Xilinx SDK does not add extra size.
Such a project, the source code in the src directory, there is a Makefile in the Debug/Release directory. Go to the Debug or Release directory, execute "make clean" to clear the project, and execute "make" to compile the project. With this command-line compilation feature, other tools, such as ultra edit and source insight, can integrate the compilation functions of the project. This also makes it easy to package the project and pass it to other machines for compilation.
When not using a BSP project, the device drivers provided by Xilinx are not automatically included in the customer's project. However, customers can also easily use the device driver provided by Xilinx. Just copy the driver code to the src directory and provide relevant hardware information. For example, for a QSPI device, copy the corresponding driver code from the installation directory or the existing BSP project directory. In 2013.4, the location of the QSPI device driver in the installation directory
In "\SDK\2013.4\sw\XilinxProcessorIPLib\drivers\qspips_v2_03_a\src". In the driver's "_g.c", you need to define the base address of the device, etc., which is generally defined in xparameters.h. If the user does not use the xparameters.h file, they will need to provide this information themselves.
Curing Screen Protector,Hydrogel Phone Cutting Machine,Protective Film Cutter Machine,Screen Protcter Custting Machine
Shenzhen TUOLI Electronic Technology Co., Ltd. , https://www.szhydrogelprotector.com