In order to realize the automation of industrial production, it is necessary to comprehensively monitor the temperature, pressure, flow, level and other data in the production process. These functions are realized by the corresponding detection instruments. Once the instrument fails, it will cause serious damage to the normal production of industrial production. influences.
Therefore, the industrial control personnel must be proficient in the physical structure, measurement principle and performance indicators of the four instruments, and can accurately diagnose and handle the instrument failure, thus ensuring the normal operation of industrial production.
First, industrial automation control four instruments
1 temperature meter
The chemical reactions and changes carried out in petrochemical production need to be carried out smoothly under specific temperature and pressure conditions. In order to monitor temperature changes in real time and precisely control the temperature range, a certain number of temperature meters must be arranged in the production. At present, the contact temperature measurement is mainly used for the production temperature, and the temperature data is measured by thermocouples, thermal resistors and the like, and the field temperature technology is used to achieve the automatic temperature control effect.
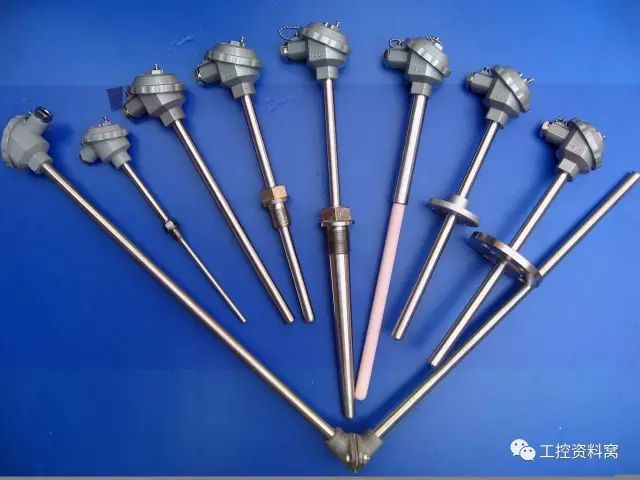
Thermocouple and thermal resistance identification
The shape of the industrial thermocouple and the thermal resistance protection sleeve is almost the same, and some of the temperature measuring components have a small outer shape, such as the armor type, and the shapes are basically the same.
1. In the case of a nameplate and a model, it can be identified by nameplate.
Thermocouple: The principle is thermoelectric effect, and its indexing numbers are seven standardized models of S, B, E, K, R, J, and T.
Thermal resistance: The principle is the thermal effect of the resistance (the characteristic that the resistance value of the conductor or semiconductor changes with temperature), and the division numbers are Pt10, Pt100, Pt1000, Cu50 and Cu100. Among them, Pt100 and Cu50 are the most widely used.
2. In the case where there is no nameplate and no model is known, the following methods can be used for identification.
(1) Look at the lead wire of the temperature measuring component. Usually, the thermocouple has only two lead wires. If there are three lead wires, it is a thermal resistor.
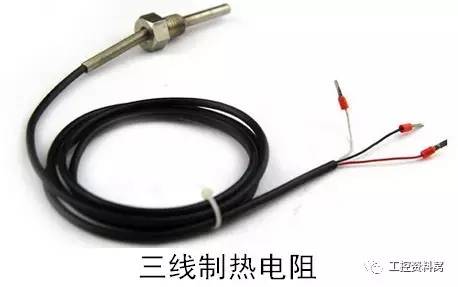
However, for four lead wires, it is necessary to measure the resistance value to determine whether it is a double thermocouple or a four-wire thermal resistor. First find two pairs of lead wires with almost zero resistance from the four lead wires, and then measure the resistance between the two pairs of lead wires. If it is infinite, it is a pair of thermocouples, and the pair of resistance values ​​is almost zero. The lead wire is a thermocouple. If the resistance of the two pairs of lead wires is between 10 and 110, it is a single four-wire thermal resistance. If the resistance of the two pairs of wires is the closest to the thermal resistance of the indexing number, then the thermal resistance of the indexing number is .
(2) If there are only two lead wires, it can be judged by measuring the resistance value with a digital multimeter. Since the resistance value of the thermocouple is small, the thermal resistance is almost zero; if the resistance value is small when measuring, it may be a thermocouple. The thermal resistance at room temperature will also have a minimum resistance value greater than 10.
2 pressure gauge
Pressure gauges are available in a variety of types, such as pressure sensors, pressure transmitters, special pressure gauges, etc. Pressure gauges can be used for pressure measurement in extreme environments such as high temperature and corrosion, as well as pressure measurement for easy crystallization and granular media.
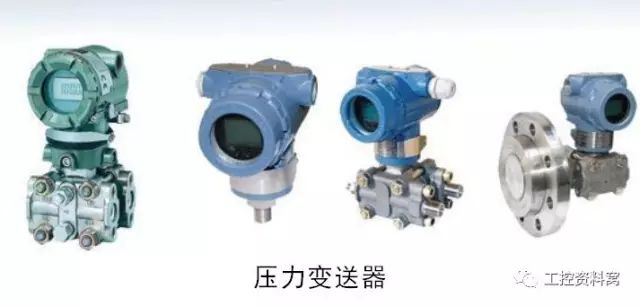
Normally, the pressure regulation system will send the collected signals to the distributed control system through the pressure transmitter to achieve automatic pressure measurement and control effects.
3 level meter
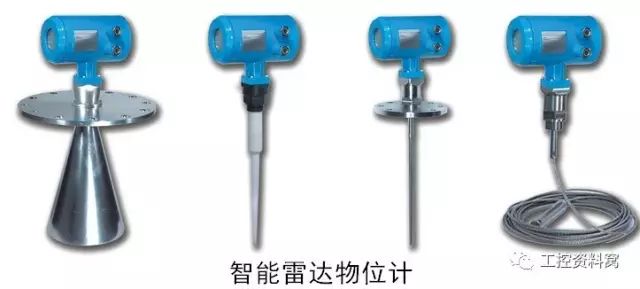
According to the different measurement methods, the level instrument can be divided into buoyancy type, direct reading type, differential pressure type, radiant type, radar type, etc. In petrochemical production, the radar type level meter has high measurement precision and at the same time Petrochemical materials have strong applicability and are gradually being favored by the industry.
4 flow meter
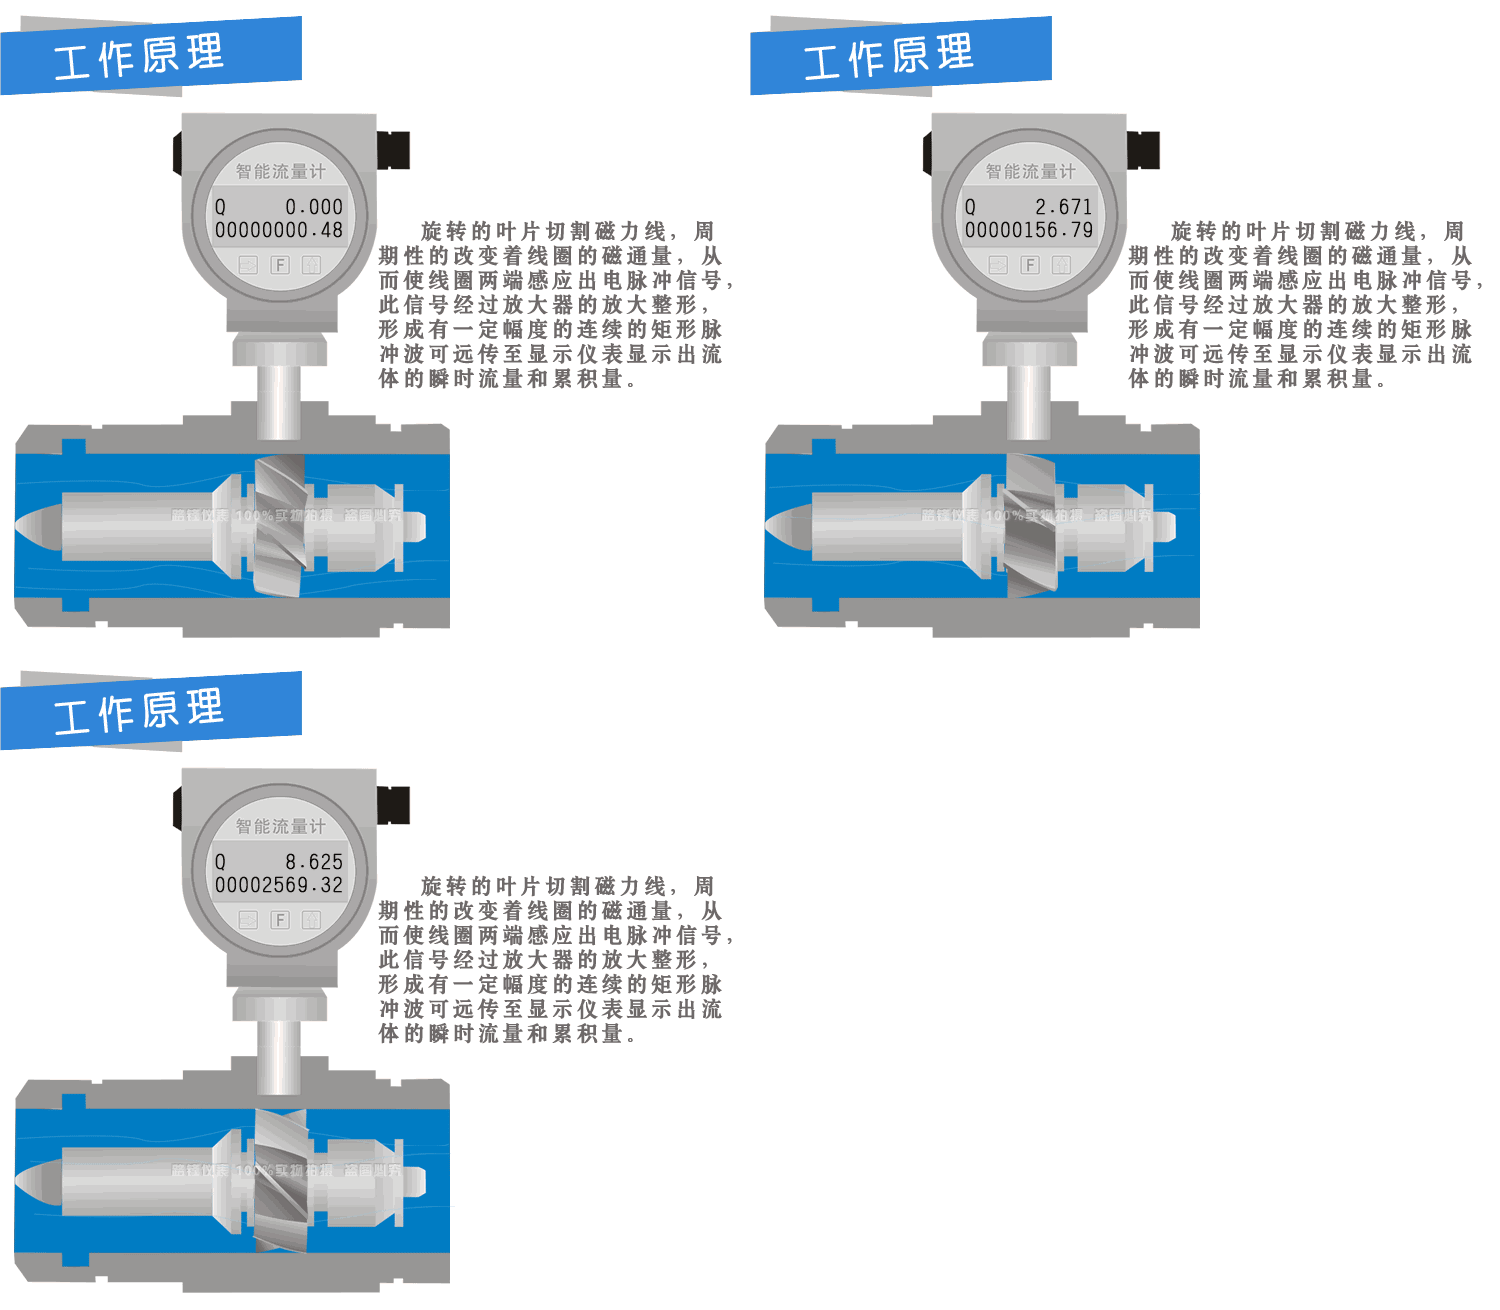
The flow meter is basically based on two measurement principles, one is the volume flow measurement, and the other is the mass flow measurement. Orifice differential pressure flowmeters, electromagnetic flowmeters, ultrasonic flowmeters, vortex flowmeters, etc., almost all flowmeters are flowmeters that detect volume. Since it is now intelligent, the mass flow can be detected by simply changing the internal parameters of the flow meter.
Second, the cause analysis of instrument failure
Usually, the automatic control instrument consists of three parts: sensor, transmitter and display. The sensor is responsible for detecting the analog signal of the measured object; the transmitter is responsible for converting the signal output by the sensor into a standard current signal (4~20 mA) and transmitting the signal to the PLC controller; the display is responsible for visual display of the measured data.
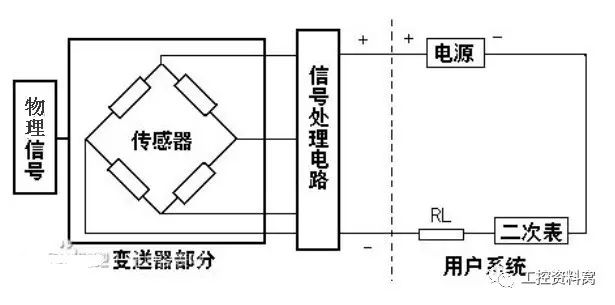
Instrument faults usually appear as indicating abnormalities, such as low, high, non-moving, abnormal fluctuations, etc. There are two reasons for abnormalities in the instrument:
1. The process parameters themselves are abnormal;
2. A fault occurs in one part of the measurement system, resulting in inaccurate data display.
The method to correctly diagnose the cause of the failure:
1. Have a certain understanding of the measuring principle, physical structure and use characteristics of the instrument;
2. Be familiar with the entire workflow of the measurement system;
3. Have a deep understanding of the process flow, material properties and equipment properties of industrial production.
The following is a detailed explanation of the common troubles of the four major instruments.
1 flow meter failure
1) If the flow meter value reaches the highest, the general on-site instrumentation will also display the highest. At this time, manually adjust the size of the remote control valve. If the flow value decreases, it indicates a process problem; if the flow value does not change, it should be the fault of the instrument system. It is necessary to detect whether there is an abnormality in the instrument signal transmission system, the measurement pressure system, and the like.
2) If the flow index fluctuates abnormally, the system can be transferred from automatic control to manual. If there is still a fluctuation condition, it is caused by the process cause; if the fluctuation is reduced, it indicates that it is a PID parameter problem or a meter problem.
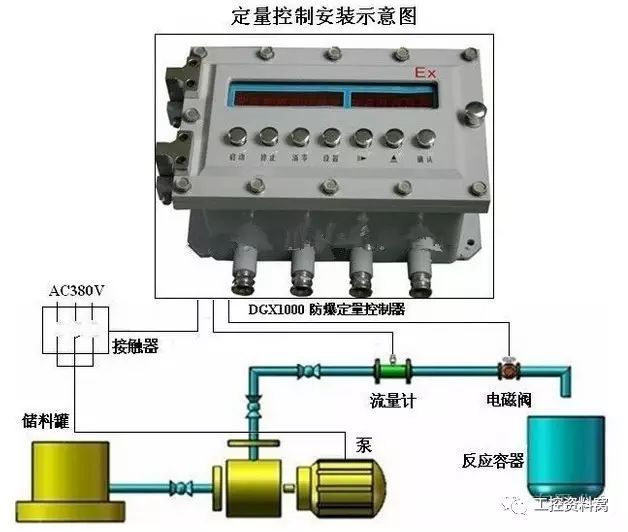
3) If the meter flow reaches the minimum, first check the on-site detection instrument. If the on-site instrument also shows the lowest, then check the opening of the regulating valve. The opening degree is zero, indicating that the fault occurs on the flow regulating device. If the opening is normal, it is very likely Material crystallization, pipe blockage or low pressure. If the on-site instrument is normal, it indicates that there is a problem with the instrument. The cause is usually the mechanical instrument gear jam, the differential pressure transmitter positive pressure chamber leakage.
2 level instrument failure
1) When the liquid level meter reaches the highest or lowest value, judge according to the on-site instrument. If the field instrument is normal, change the system to manual control to check whether the liquid level changes. If the liquid level can be stable within a certain range, The explanation is that there is a problem with the liquid level control system, and vice versa.
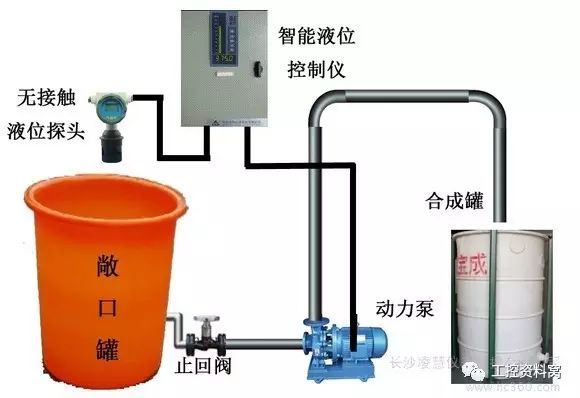
2) For differential pressure type liquid level meter, when the display data of the control instrument and the on-site detection instrument do not match, and the field instrument does not have obvious abnormality, check whether the liquid pressure of the pressure guiding tube is normal. If there is leakage phenomenon, supplement the sealing liquid, the instrument Return to zero; if there is no leakage, the initial inference is that the negative migration of the instrument is wrong and needs to be corrected.
3) When the data of the liquid level control instrument fluctuates abnormally, it should be judged according to the capacity of the equipment. If the equipment capacity is large, it is usually a problem with the instrument; if the equipment capacity is small, the process operation must be checked first. If the process operation changes, It is very likely that it is a process-induced fluctuation, and vice versa.
3 pressure gauge failure
When the pressure gauge data is abnormal, it should be based on the physical state of the measured medium - solid, liquid, and gaseous, for targeted detection and diagnosis.
1) When the pressure control instrument is abnormally fluctuating, it is necessary to first confirm the change of the process operation, because such changes are mostly caused by process operation and abnormal PID parameters.
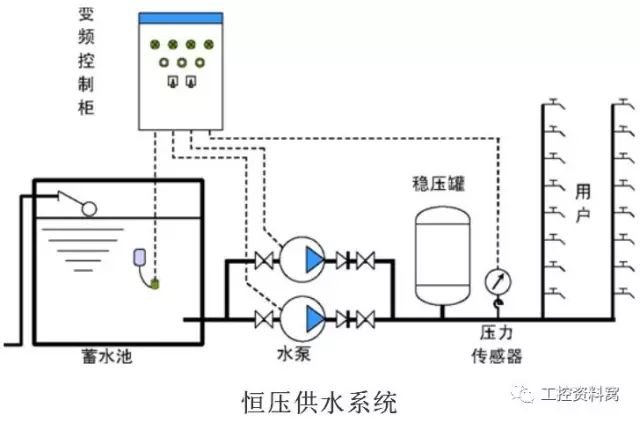
2) When the control instrument is stagnant, that is, when the process operation changes, the instrument data remains constant, usually due to the failure of the pressure measurement system. At this time, first confirm whether there is any obstruction of the pressure guiding pipe. If the pipe is unblocked, confirm whether the pressure transmission output device is in a normal state. If abnormal changes are found, it can be confirmed that the problem occurs in the measurement indicating system.
4 temperature instrument failure
Temperature instrument failure usually shows high or low output or slow response. When the temperature instrument fails, pay attention to the following two points: First, the temperature instrument mostly uses electric instrument; second, the system instrument is more obvious when testing. Hysteresis.
1) The temperature meter data suddenly changes to the highest or lowest, which is usually a problem in the instrument system. This is because the instrument system itself has a certain hysteresis, and there are few sudden changes. In the case of sudden changes, it is usually caused by an abnormality in thermistor, thermocouple or transmission amplifier.
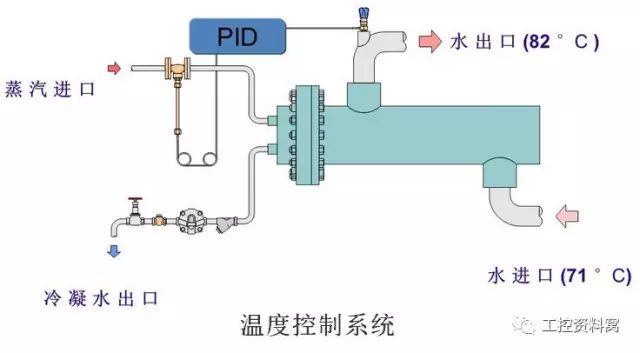
2) When the temperature control instrument generates high frequency abnormal fluctuation, it is usually caused by improper PID parameter setting.
3) When the temperature control instrument has obvious slow fluctuations, it is generally caused by changes in process operation. If the impact of the process operation can be ruled out, it is highly probable that the instrument control system has failed.
Conclusion
The application of industrial automation instrument control system has brought great convenience to the industrial control industry, repositioning the interaction between people and industrial control systems.
In the analysis and processing of actual industrial control instrument failure, not only must have a solid instrument theory and knowledge, but also a detailed understanding of the process practice, in order to quickly diagnose the instrument failure, and then take appropriate measures for troubleshooting, Guarantee the smooth progress of industrial production.
SUNLUX IOT Technology (Guangdong) INC. , https://www.sunluxbarcodereader.com